Ad-free internet with a (headless) Raspberry Pi
Wed Sep 27 2023
On todays cooking takeover we are baking a Raspberry Pie
- You can use either fresh or frozen raspberries for this pie. Don’t thaw the raspberries if you’re using frozen, just use them straight out of the freezer.
- If you don’t want to make your own pie crust, you can use store bought pie dough for this recipe. But I highly recommend this easy homemade pie crust recipe!
- This pie needs to be baked at 425F for 15 minutes, and then you lower the oven temperature to 375F and continue baking for another 35-40 minutes. Don’t miss that second bake time at the lower temperature or your pie will not be fully baked!
- Make sure to continue baking this pie until the filling is bubbling. If the pie crust is getting too dark, just tent it with some foil and continue baking. The filling won’t set as it cools if it doesn’t boil while it’s baking.
With the token (over-done) joke out of the way - Raspberry Pis, everyones favourite low cost teeny tiny computer perfect for home projects.
Todays order? Setting up a Raspberry Pi Zero to headlessly (without a monitor for you non-tech folx) run Pi-hole to help keep my home internet ad free. A Pi-hole is a general purpose network-wide ad-blocker that protects your network from ads and trackers without requiring any setup on individual devices.
Could I have run this through docker and not have purchased a Raspberry Pi? Completely. However a Raspberry Pi requires very little power to run 24/7, is inexpensive (mine was $9), and reliable. Really I’m saving money (or at least this is the lie I get to tell myself). Beyond this - I’m a sucker for consumerism and good-old-fashion instant gratification. Ingredients for todays recipe are pretty simple.
- 1x Raspberry Pi Zero
- 1x Case (optional)
- 1x Charger (micro USB)
- 1x ethernet cable and micro USB-eth adapter. (Alternatively, you can purchase a Pi Zero W and run it over wi-fi).
Step #1 - Installing an OS
- Download the latest version of your OS of choice (were using Raspbian). I chose the Lite install given our project.
- Insert your microSD card into your computer
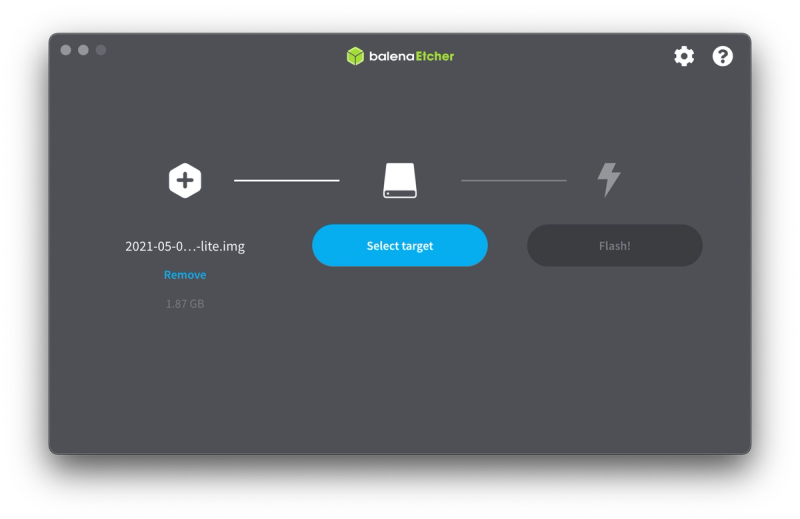
- Write the OS to the microSD. To do this you need a writing tool, I used balenaEtcher which is available on Mac/Linux/Windows.
- Select your downloaded file, select your target (microSD card), and press Flash!

Documentation:
Installing operating system images - Raspberry Pi Documentation
Step #2 - Enabling SSH
For headless setup, SSH can be enabled by placing a file named ssh, without any extension, onto the boot partition of the SD card from another computer. When the Pi boots, it looks for the ssh file. If it is found, SSH is enabled and the file is deleted. The content of the file does not matter; it could contain text, or nothing at all. Easy-peasy.
Documentation:
SSH (Secure Shell) - Raspberry Pi Documentation
Step #3 - Baking Booting the Pi
- Move the microSD card from the computer into the Raspberry Pi’s microSD card slot.
- Connect your Raspberry Pi to your router, and connect to power.
- Wait for it to boot and then find its IP address from your router. Look for the device with the hostname ‘raspberrypi” and make a note of its IP address.
Step #4 - Connecting and securing.
With your SSH client of choice ssh into your IP address. The default user is pi and password is raspberry. On a Mac this will look like:
ssh pi@192.PI.IP.ADDRESS
Now, your Raspberry Pi will not be accessible from the Internet by default from this setup, but it’s a good idea to do some hardening anyway.
First things first is to change the default password of the pi user. This is done through the passwd command.
Enter passwd on the command line and press Enter. You'll be prompted to enter your current password to authenticate, and then asked for a new password. Press Enter on completion and you'll be asked to confirm it. Note that no characters will be displayed while entering your password.
Once you've correctly confirmed your password, you'll be shown a success message (passwd: password updated successfully), and the new password will apply immediately. Its also a good move to create a new user, instead of logging in with 'pi'.
You can create additional users on your Raspberry Pi OS installation with the adduser command.
Enter sudo adduser username and you'll be prompted for a password for the new user username. Change ‘username’ with what you want your user to be called - typically your name.
Ex, sudo adduser silver (if your name is Silver and you moonlight as a pirate.)
Add the new user to the sudo group.
Sudo adduser silver sudo.
Again, replacing silver with the name of the user you made in the last step.
Log out of your current SSH session, and log back in with the new user.
ssh silver@ipaddress
You can delete the pi user however this isn’t recommended. With the current Raspberry Pi OS distribution, there are some aspects that require the pi user to be present.
Documentation:
Securing your Raspberry Pi - Raspberry Pi Documentation
Linux users - Raspberry Pi Documentation
Step #5 -Installing Pi-hole
Everything we’ve done so far is to get the Raspberry Pi working, and secured to now install Pi-hole.This last bit is as easy as pi (last joke I promise).
Run the command
curl -sSL https://install.pi-hole.net | bash
After that, follow the on screen instructions. I used Cloudflare for an upstream DNS provider, and beyond that left everything as default.
Once the install is complete, you’ll see a summary - write down both the IP address and web admin interface password.
Now you can login into the Pi-hole web admin interface, at
http://<IP_ADDRESS_OF_YOUR_RASPBERRY_PI>/admin/
Documentation:
Installation - Pi-hole documentation
Step #6 -Configuring your router

This step is router specific - good luck!
Before configuring your router its a good idea to find a webpage that has ads and test before/after so you can make sure its working well.
Have a look at the post-install documentation and it should help set you in the right direction.
For most routers you're looking for a setting to specify your Primary DNS to your Raspberry Pi IP Address.
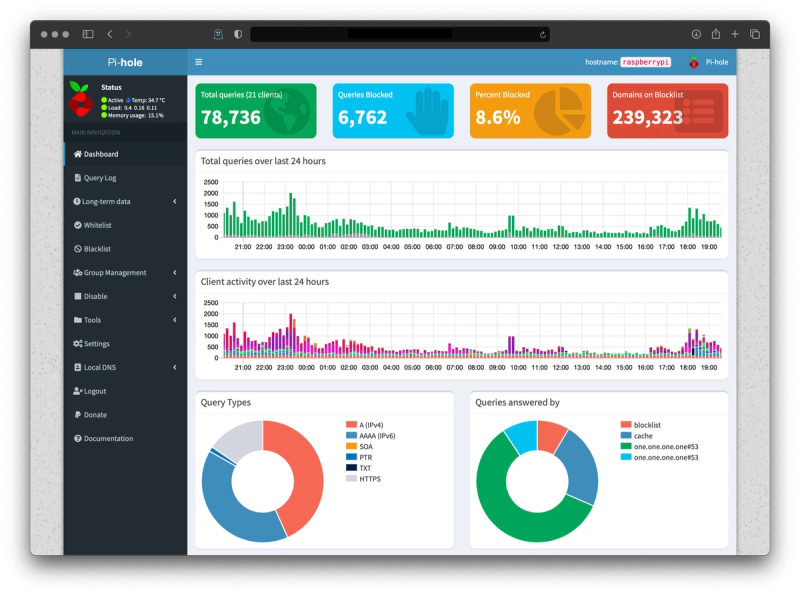
Once that’s done - ta-da! Ad free internet. Log onto your Pi-hole web admin interface and bask in your prowess as your queries blocked increases. You’ll have a default block list, but you can add extras under the Group Management > Adlists panel - I used the lists from here and haven’t encountered any false positives yet whilst tripling my domains on blocklist from default. I’m currently averaging between 8-10% of queries blocked.
Documentation:
Post-Install - Pi-hole documentation
All in all, a worthy afternoon project! I had most of the cables already, so for the price of a Raspberry Pi, case, and ethernet adapter ($30ish?) accessing my favourite sites at home without seeing all those advertisements was well worth it.